Friday, October 5, 2012

Custom Gold Artwork


I moved in to my new house this summer and was in desperate need of some cute decor.  If you've got a lot of patience and about a days worth of time, you can make this eye catching, gold wall art.  It's a beautiful accent piece to any room (I chose my dining room) and so so easy!

What you need:
1.  Large foam poster board (doesn't have to be super thick)

2.  Lots of cardstock

3.  Gold spray paint (2 cans)

4.  Newspaper (for the cardstock to lay on for painting outside)
5.  A cup (with about 3-4 inch diameter) to trace the circles
6.  Scissors
7.  Roll of tape

How you make it:

1.  Trace the circular cup you've selected on to the cardstock.  Each piece of cardstock can hold about 6 circles on it.
2.  Cut out the circles and place them on the newspaper outside
3.  Spray paint each circle and let dry
4.  Start taping the dried circles on to the foam poster board.  For the very first row, place the circles so that they hang over the edges of the board so no white is showing.  For the 2nd row, place each circle staggered from the row above (like fish scales) and overlapping the above layer a little bit.  Make sure no white is showing underneath.  Place the circles in by making a doughnut role of tape and sticking it to the back of the gold circle.
5.  Repeat steps 1-4 until the whole board is covered (this is the exhausting part, but the final product is so worth it!)
6.  When the board is finally covered, cut the overhanging edges of circles off from each side of the board so you have an even line all the way around.


You're done!  What a beautiful and inexpensive piece of art!


Homemade Fall Wreath


Making wreaths for holidays are so easy and super cute.  I change mine with every season!  This is the one I made for this fall and you can do it too.  Just follow these easy steps!

All the supplies you need can be found at any crafting store (I go to Hobby Lobby)

Things you need:
1.  Medium sized twig wreath (~ $4)
2.  Fake flowers in fall colors/fake feathers (if you want!)  (~$8-12)
3.  Hot glue gun and glue gun sticks
4.  Ribbon (I used a light gold)
5.  3M Command hook (for hanging the wreath on to your door)
6.  Burlap or ribbon for the bow (~$5 or less)


How to make it:
1.  Pull of the fake flowers off their stems and place on the wreath how you'd like them arranged
2.  Make sure your glue gun is warm!
3.  Glue each flower on the wreath as desired
4.  Cut the hanging ribbon at a length of about 3 to 4 feet.  Fold ribbon in half and tie around the top of the wreath with even lengths making a large loop for hanging.
5.  Tie a bow and glue it to the top of the wreath.  To make a perfect, easy bow like the one above, cut a long strip of burlap (about 3-4 inches wide and 5 feet long).  Hold one end in your hand and make a loop about 4 inches long to one side, then to the other side and keep switching loops to each side until you have 3 loops on each side.  Wrap the remaining fabric from the end of the last loops around the middle of the loops where your hand should be.  Loop it around about 2 times, cut excess and glue the end of the fabric at the back of your center wrap.  Fluff out the side loops and you're good to go!

Enjoy!

Here's a picture of my spring wreath!  You can paint wooden numbers and glue them on for your address.  Such a cute touch!


Monday, August 22, 2011

Modge Podge that Agenda

So my OSU ladies....Have you gotten your Mortar Board yet?  If you don't know what that is, it's an agenda that the amazing people at Mortar Board put together that already has all of the important dates and happenings at OSU typed in!  Awesome? Awesome.

But now we have a conundrum....every mortar board looks the same.  Crap.  Wait what's that you say?  I can decorate it all on my own?  Heck yes you can.  And here are some ways you can make your mortar board unique.

What do you need:
1.  A MORTAR BOARD (or any store bought agenda)
2.  Any crafting supplies you can get your hands on (scrap book paper, fake flowers, jewels, stickers, ribbon, you name it)
3.  Modge Podge
4.  Paint brushes
5.  An imagination

Here are some inspiring photos to spark your imagination:


This is what you need to do/incorporate into your agenda:
1.  Layer, layer, layer
2.  More is better
3.  Pick a color theme and then choose details in those colors

Here are some techniques:
1.  Do a rip collage.  What is that?  You rip chunks of paper, layer them, and it makes a cute collage
2.  Be bold with buttons, beads, braided ribbon or string
3.  Print out your favorite quote and stick it on there
4.  Don't forget your name!  Either print it, write it, draw it, or do magazine clippings of letters

Here are mine and my roomies!  Love them!


Yay!  Now go forth and hodge podge.  Happy first day of school my fellow Oklahoma Staters!


Monday, August 1, 2011

Peanut Butter Banana Brownie Pizza


OK so you're in a rush to make a delicious dessert for a party or maybe you just really love clogging your arteries with yummy chocolate goodness.  Whether entertainer is your name or stuffing your face is your game, I've got a desert for you: DESSERT PIZZA.

This exquisite treat only takes about 30 minutes!

Here's what you need:
1.  Brownie Mix (I use Betty Crocker)
2.  Eggs
3.  Vegetable Oil
4.  Water
5.  Cream Cheese (1 box)
6.  Peanut Butter (about 2 or 3 big scoops)
7.  Sugar (2 table spoons)
8.  Large Bananas (3)
9.  Meltable chocolate (I use the Bakers strawberry dipping kind in a tub)
10.  Pizza Pan

Here's how you make this yummy in my tummy dessert:
1.  First set your oven to 350 degrees.
2.  Next mix your brownie mix with the eggs, oil and water as directed by the box and poor the mix over the pizza pan so it's nice and even.  Pit this guy in the oven for about 20 minutes!
3.  Now mix the cream cheese, peanut butter and sugar in a medium sized mixing bowl until smooth and creamy.  It may be difficult if your cream cheese isn't soft yet so you can put it in the microwave for 20 or 30 seconds to soften. (I usually make my boyfriend do this mixing part because he's strong and muscly haha)
4.  Now chop up the bananas into about 1/2 cm slices.
5.  Once your brownie is cooked and cooled (for about 10 minutes), paste the peanut butter and cream cheese paste on like it's a sauce of a pizza, leaving about an inch of the brownie peeking out on the sides.
6.  Then, place the bananas on the pizza like they're pepperoni's, working from the outside in.
7.  Finally, melt the chocolate in the microwave until it's smooth and runny and then take a spoon and drizzle it over the pizza in whatever fashion you'd like!  YUM!


Tuesday, July 12, 2011

How to Reupholster a Chair

Do you have a couple of tacky dining room chairs that look like they came from the 70's?  Or are you a college kid who gets all the hand-me-downs and you just want something cute for your dorm?  Or maybe you just want to redecorate and that chair in the corner doesn't match?  Well why not reupholster it!!  It's actually REALLY easy and doesn't take long at all.  You just need to make sure you have all the right tools!


What you need:
1.  A chair
2.  Choice of fabric (about a yard or so)
3.  Staple gun and staples
4.  Screw driver (either flat or 4 pronged depending on which type of nails are in your chair)
5.  Scissors
6.  Toothpicks (if needed)*

Here's how you do it:
1.  Unscrew the piece to be upholstered from the chair frame and lay it on your fabric with the fabric facing the way you want it on the chair.
2.  Cut the fabric so that about 4 inches stick out from the sides around the chair bottom like this:
3.  Fold the top edge over and staple to the chair bottom.  Pull the opposite side over, pull tight and staple. I like to staple about 3 staples on each side.  Keep doing this until the sides are stapled tight.
4.  Now leaves the corners: pull the fabric back, tuck the sides in and fold over and place a staple on each side of the fold.  If this is too complicated or hard to follow, just try and fold the corners over in any way you can, secure them with staples and make sure no fabric sticks out!
5.  Now that your seat is all covered, let's reattach it!  You'll just need to hold it back on where you found it and twist the screws back in.  
*6.  If your holes are stripped like mine were because my chair had been reupholstered 4 times, then you'll have to use my toothpick trick.  Break a toothpick into 3 parts (1 toothpick per hole) and stick the 3 parts down into the screw hole.  This should give enough wood for your screw to hold on to!


You're done!! How easy was that.  Now time for a before and after photo:

BEFORE

AFTER


American Flag Cake

I know it's a little late for the 4th of July ( I made this on the 4th), but this may be a great idea for you to make next year, for labor day, memorial day or any other occasion in where you feel extra American!  This cake is SUPER easy and pretty inexpensive to make (especially if you're buying strawberries in the summer = cheap).  This cake is also super light so it's a perfect dessert if you've got a belly full of heavy BBQ. Also, it requires NO baking! Excellent!  Let's get started.


Here's what you'll need:

1.  Package of frozen pound cake (found in the freezer section)
2.  Tub of cool whip
3.  2 tubs of strawberries
4.  Tub of blueberries
5.  Glass or tin pan to put it all in

Here's how you do it:

1.  Once you bring the goods home from the grocery store, put the frozen pound cake in the fridge to let it thaw.  Make sure it thaws for a little while before you use it.
2.  Slice the pound cake into about 1cm thick slices to lay down on the bottom of the pan.
3.  Cover the pound cake with one whole tub of sliced strawberries and some blueberries.  I like to slice the strawberries into smaller pieces so you can eat them better.
4.  Dump the cool whip over the top of all of this and spread it out so the whole cake is covered.
5.  Slice the remaining strawberries in half.  Lay them round side up in lines and these will make the stripes.  Use the remaining blueberries to make the "stars" at the top left corner of the flag. 


***I really like making my own cool whip  (it just tastes soooo dang good) so I'm going to give you that recipe here if you'd like to use it for this cake or for anything else that requires cool whip.

Ingredients:
1.  Heavy whipping cream 1 cup
2.  Powdered sugar about 1/2 cup
3.  Vanilla extract 1 teaspoon

The how:

1.  make sure the cream is cold.  Place in a mixing bowl and beat with an electric egg beater on high until it starts to become fluffy.
2.  Add powdered sugar and vanilla and whip some more until it starts to look like it will become lumpy.

You're done!  It's so easy and mmmmmm that homemade whipped cream tastes delicious ugh!!!

Tuesday, July 5, 2011

Funky Photo Board


Tired of boring picture frames?  Need a display to easily show off all your latest concert tickets, graduation pictures or business cards?  Think that picture boards are too expensive, or not in the right fabric or frame for you?  Well you can change all of that to your liking!  Let's do this!

Supplies:
1.  Picture frame
2.  Fabric (I used two: lace and satin)
3.  Hot glue and glue gun
4.  Buttons
5.  Ribbon
6.  Paint (optional)
7.  Batting 
8.  Thread and sturdy needle


How you do this beauty:
1.  Take off the frame backing and discard the glass.
2.  Paint the frame with white paint slightly streaky so it comes out with an antique finish (if desired) and let dry.
3.  Cut out a piece of batting to fit the size of the frame back.
4.  Cut your fabric so that about an inch can wrap around to the back of the frame backing all the way around.
5.  Pull the fabric over the frame backing with the batting underneath and secure with hot glue all the way around, pulling tightly throughout.
6.  Cut strips of ribbon in lengths to make a criss cross pattern over the secured fabric.  Glue these strips only on the ends of the ribbon that are behind the back of the frame backing.
7.  Where the ribbons cross, pull a thread through the whole thing and sew a button tightly, pinching in the batting, fabric and ribbon.

You're all done, now add whatever items: pictures, ticket stubs, movie stubs, memos, recipes etc., to your new creation.  I swear it's easier than it looks!

Fabric Flower Hair Pins


Want a chick hairpiece for summer time?  Need a unique, easy, homemade hair accessory for the start of school?  I've got a simple project for you if you're up to the challenge of battling hot glue.  Let's get started!

This is what you need:
1.  Fabric of choice (The bargain bin at Hobby Lobby can have some great buys for pennies on the dollar!) (I find that lace ends up turning out beautiful and goes pretty much everything)
2.  Glue gun with glue sticks
3.  Sticky back felt (you can find a pack of assorted colors in the craft section at Walmart for only $2)
4.  Bobby pins
5.  Jewels, pearls, etc. for embellishment
6.  Scissors
7.  Tough fingers!! (this glue is ruthless if you make many at once!)

This is how you do it:
1.  Cut your fabric into a strip about an inch wide and about 3 feet long depending on the size of your desired flower.
2.  Twist the strip so it makes a rope like string.
3.  Roll the fabric into a small wheel and glue on one side only, making sure all seams are glued together.
4.  Once the glue has cooled a little, press your thumb into the glue to make sure the fabric is stuck together.
5.  Continue twisting the fabric and rolling the wheel while glueing at the seams and pressing until the flower is your desired size.  Cut the fabric and glue the frayed end over to the back of the flower to secure.
6.  Cut out a circle of the sticky back felt about the size of the flower.
7.  Peel off the sticky back cover, open the bobby pin and slip the sticky felt in with the sticky side facing out.
8.  Press the Rossette to the sticky felt to secure the bobby pin to the flower (add a little hot glue to each end to make sure it's totally secured)
9.  If desired glue a pearl, jewel, etc. to the top of the rossette for added flair!


There you have it!  It might sound a little confusing but you can do it!  Just feel the pattern of the flower and how the rolls into a wheel make a round flower.  Leave any questions in the comments section if you need more assistance!  I LOVE these hairpieces!  They go with anything and hold your hair back easily for a hot summer day.

Sunday, July 3, 2011

Sweet Berry Cupcakes


These are one of my absolute favorite cupcakes to make AND eat!  They're light, fluffy and filled with fruit to make it a great snack, light dessert and delicious summer treat!  Watch out though, they might all be gone in a few days (especially if you have a granny like mine who can eat 3 in one sitting).

Ingredients:
1.  Box of White Cake Mix
2.  Water
3.  Eggs (you'll need just the whites)
4.  Vegetable oil
5.  Raspberries
6.  Blueberries
7.  Cupcakes sleeves
8.  Cupcake pan
9.  2 boxes of Cream Cheese
10.  Powdered Sugar
11.  Vanilla Extract

How to make the cupcakes:
1.  Preheat the oven to 350.
2.  Mix the cake mix according to the instructions on the box.  Getting the egg whites can be a little tricky.  I like to put them in a separate bowl incase I mess up!
3.  Mix in the raspberries and about 1/2 to 3/4 of the blueberries.
4.  Scoop in the mixture with a ladle until each cupcake sleeve is about 3/4 full.
5.  Place in the oven for about 25 minutes or until a toothpick comes out clean.
6.  Let cool for about 10 to 15 minutes.

How to make the icing:
1.  Melt the cream cheese in microwave for about a minute.  If it's not melted all the way, put it back in for another minute or until creamy and smooth.
2.  Mix in 1/2 cup to a cup of powdered sugar until it meets your sweetness level.
3.  Add in a teaspoon of vanilla extract.
4.  Mix until smooth and creamy!
5.  Scoop into a plastic baggy and put into the fridge to let cool.
6.  Once it's cooled, cut a dime sized hole at the corner of the bag and ice the cupcakes in a swirl fashion starting from the outside going in.  Dab the icing and pull up in the middle of the cake!

You're done!!  Now sink those teeth into the most juicy, delectable cupcake you've had all summer. Yummmmmmmm!

Lace Hat Boxes


So I had some old, ugly hat boxes that matched my room when I was a kid.  Needless to say they didn't quite match my current decor.  If this doesn't sound like you, but you like the idea of a cute hat box for decoration and/or storage, then I've got the solution for you.

This is what you need:
1.  A cardboard hat box. (only $3 for one about 8 inches in diameter!)
2.  Spray paint in two colors (you may need two cans of each if doing more than one box,  I used 2 cans of each and I had 4 boxes with hard to cover prints)
3.  Lace fabric (you can get a roll of it at Hobby Lobby for $2)
4.  Newspaper
5.  Scissors
6.  Tape

This is how you pull this off:
1.  Spray paint the bottom section of the box laying upside down in one color.  Spray the lid in the other color.
2.  Once the lid has dried lay the lace over the lid and tape the edges underneath to it's pulled tight and covers the whole lid.
3.  Spray over the lace in the same color as the bottom of the box.
4.  Pull the lace off the lid once you're done painting so it doesn't dry and stick to the lid.
5.  Let all of your items dry and tada!  You're done!

Now you've got a cute decorative piece to add to your room.  Plus it's functional as storage!  Win win!

SUPER Cheap and Easy Wall Art


Want some contemporary wall art?  Have an awkward, empty wall space at home you just need to fill?  Well I've got a super cheap alternative to sifting through tons of artwork, shopping for hours and paying tons of money.  Let's get started!

Here's what you'll need:
1.  A canvas.  I get mine at Big Lots and they run for about $4 wahoo!
2.  Acrylic Paint in whichever color you choose (only $1)
3.  Paper: in any color or any type (I chose a color the same as the paint I used)
4.  Hot glue gun with glue sticks
5.  Beads (any kind)
6.  Paint brush


Here's how you do it:
1.  Paint the canvas in the color you chose
2.  Now for the flowers (it can get a bit tricky explaining it in writing so pay attention)
     a.  Cut out tear drop shapes.  You'll need four per flower so make all four the same size.
     b.  Cut a slit about a centimeter long at the pointy end of the tear drop.  Like this:
     c.  Fold the flaps on either side of the slit over each other and glue so that it makes a 3D petal.  Like this:

     d.  Now that you've done it to each of the 4 petals, glue them all together in the middle.  I usually place a drop of glue a the end of one petal, glue 2 on each side and then place one more drop of glue to attach the final petal to the other 3.
     e.  Glue a bead, pearl or jewel to the center of the petal for a final touch!
3.  Now glue the flowers, in various sizes, to the dried canvas in whatever fashion you'd like.


Fun Flag Border


Have wedding planning to do that you want to make unique?  Are you getting a surprise birthday party ready that you want to make super special?  Or are you just decorating a room that needs that original touch?  I have a fast and easy way for you to do it.  How about you make a flag border!

Here's what you need:
1.  3 fabrics of your choice (I picked a color theme of white, black and turquoise)
2.  String or ribbon that needs to be pretty long (I choose a thin twine)
3.  Hot glue and glue gun
4.  Paper/cardboard/cardstock (for making a triangle pattern)
5.  GOOD scissors 

Here's how you do it:
1.  Make a triangle pattern on your sturdy paper.  It can be complicated if free handing so I used a straight edge and several tries to get the one I wanted.  You can make it whatever size you want but I did mine about the size of my hand if I was making a jazz hand.
2.  Cut out about 15 triangles of each fabric (You can cut out less if you want a smaller banner)
3.  Now here's the sticky part.  Hot glue!  Glue a line across the top of the first flag, place the string over the glue and fold the top edge over it, essentially making a small fold over the string to hold the flag in place!
4.  About 2 inches from the first flag, glue the second flag just like you did in step 3.
5.  Continue steps 3 and 4 until all the flags are glued on to the string in alternating fashion (you can either do them randomly or in a pattern)

Now your flag banner is done!  Here are some more cute ways to fashion them.  You can even put letters on them and use it as a cute engagement photo accessory! Go here here and here for some more cute examples!


Key Lime Cupcakes


Need a sweet and tangy summer treat?  Well I've got the perfect one for you, Key Lime Cupcakes!! (They're my dad's favorite!)
Here's how to make them:

The Cupcake Ingredients
1. Box of Lemon cake mix
2. Two limes (key limes if you can find them!) to squeeze 1/3 cup or more for tangy-ness
3. Small box of lime jello
4. 1/3 cup Vegetable oil
5. 3 Eggs
6. 3/4 cups Water
7. Cupcake sleeves
8. Cupcake pan

Icing Ingredients
1. 2 boxes of cream cheese
2. 1/2 cup to 1 cup of powdered sugar (at more according to the sweetness you desire)
3. 1 teaspoon of vanilla extract

How to make them
1. Preheat oven to 350 degrees
2. Mix cake mix and jello mix together
3. Poor in the rest of the ingredients and mix well (by hand or by egg beater)
*it might be a little hard to squeeze limes by hand so slice them to smaller slices for easier squeezing if you don't have a juicer
4. Fill cupcake sleeves about 3/4 full
5. Slip into the oven for about 20 minutes or until you can insert a toothpick and it comes out clean.
6. Let the cupcakes cool for 10-15 minutes.
7. Ice with the sweet cream icing I'll tell you how to make below.

Now for the icing
1. Put the two blocks of cream cheese into a microwavable bowl and microwave for a minute.
2. Take out the cream cheese and mix.  If it's not smooth and creamy, put in the microwave for one more minute or until there are no chunks left.
3. Mix in the powdered sugar until at your desired sweetness.
4. At the vanilla and mix until blended.
5. Put into large plastic baggy and put into the fridge.
6. Once cooled, cut the corner of the baggy so you can ice the cupcakes.
7. Ice in swirls going from the outside in and dab and pull up in the middle.

Enjoy these sweet summer treats.  They're perfect for entertaining!


recipe can also be found here

Monday, February 21, 2011

Sweet Valentine Gift


So it's valentines day, or your mans birthday, or a special anniversary and you need a creative gift.  I have the perfect idea for you.  Modeling after my grandparents goal of traveling all 50 states together, I decided to make my boyfriend a map of the states and to tack a picture taken in the states we've been to so far.  It's a cute, easy gift that's sure to have him wooing in no time.

Supplies:
1.  Cork board (smaller one)
2.  Paint (I chose two variations of blue)
3.  Tacks
4.  Pictures of you and your special someone
5.  Paint pen (I used black)
6.  Map of the US printed out or a picture online if you're ultra risky/artsy
7.  Cute travel icons (optional)
8.  Scrap booking letters
9.  Glue gun and sticks

How to:
1.  If you printed out the US map on a piece of paper, cut it out like a stencil and trace.  If you did like I did and didn't have time/access to an immediate printer, do your best to draw it from a picture online (google image search US map). ** don't forget Alaska and Hawaii
2.  Squirt your paint colors on a plate and paint alternatively on the map while mixing and blending at the same time to get a swirly blended look.  If that's to hard or time consuming you can do one sold color.
3.  Outline the whole thing with a black paint pen.
4.  If you want you can outline each state but I found it easier to just put the abbreviations of each state (it makes it not look as cluttered)
5.  Glue on your letters at the top for the title (mine is titled Garrett and Courtney's Travels)
6.  Make a section for Countries off to the side
7.  Glue on any cute icons or adornments (I bought a "travel" themed set of pieces in the scrap booking section that had little planes, luggage boxes and travel buttons)
8.  Tack on each picture to the corresponding state
9.  Wrap and give to your lovey!


Now that you've wowed the socks off of your special someone, go book yourself a trip to Hawaii or an Alaskan cruise to knock off some of those hard to get to places!  Lucky for me I get to mark off Minnesota, New York and New Jersey this spring break! Hurrah!

Snap Cup

 Need a crafty idea to boost moral at your chapter meetings or events?  Why don't you make a snap cup. Kudos to our friends from Legally Blonde.  This simple snap cup can add a lot of fun to your meetings by having your members put anonymous encouraging notes in the cup and then reading them loud for all to hear.  Try and count how many people blush!

Here's how you pull this puppy off:

Supplies:
1.  Glass or plastic cup (the bigger the better)
2.  Anything that shines! (jewels, sequins, sparkly buttons, etc.)
3.  Ribbon
4.  Glue gun and sticks

How to:
1.  I started off by gluing the ribbon to the top of the glass.  This would also be cute if you had some feather ribbon to add to the top of the glass.
2.  I then took sequined string and glued it around the two bulging parts of the neck of the glass. (this can get messy with glue so go slowly!)
3.  Next, adorn the bottom of the glass with a pattern of sequins and jewels.
4.  Add a design of jewels and sequins to the cup of the glass.
5.  Finally I added a cute flower to the top of the glass with a silver button in the middle.

Now you can express your inner Elle Woods and maybe even slip an anonymous note of affirmation into the cup for yourself.  After all, you are a crafting diva.

Festive Folders

 Need a cute way to organize your files?  Perhaps you want a spiffy gift to pass out to all of your cube mates.  Or maybe you have a ton of manilla folders and a bunch of paper scraps and ribbon hanging around.  Here's a fun, easy idea for making uber cute folders.  Just follow these steps below:

Supplies:
1. Manilla folders (any office supplies store or even hobby lobby has them)
2. Scrap book paper and/or cardstock
3.  Ribbon
4.  Scissors
5.  Sharpie
6.  Stencil (optional.  I used a leopard print one)
7.  Glue gun with plenty of glue sticks
8.  Glitter spray paint (optional.  I used on one of the folders)
9.  Any cutesy stickers, jewels, adornments, etc.
10.  Paint and paintbrushes

 How to:
1.  Glue on the paper you'd like to use as the base.  You can use several different types, do it landscape or profile and use different widths.  I like to make one paper base a little bit wider/bigger than the other.
2.  Glue ribbon down the separation line of the two opposing paper bases.  You can use multiple pieces of ribbon next to each other for a different look.  Feel free to use other kinds of ribbon like fluffy feather ribbon or the rosette kind I used below.
3.  Now paint on your stencil on the larger side in the middle or just simply cut out a rectangle of a different colored paper to serve as your "label" for the folder.
4.  Draw on a name for the folder or add on any adornments you deem necessary.  (I like jewels, glitter spray, cool scrap booking stickers and sequins!)


Now go knock the socks off of your coworkers and sorority sisters with your fashionista folders!  Hey you never know, maybe your teacher will give you an A for creativity.  I know I would.

Thursday, September 23, 2010

Car Hangers


Need something cute and fashionable to hang from your rear view mirror?  Want to make something for you and your bestie so you can match?  How about these adorable hangers!  You can make them as the first letter of your name or any wood shape you like!  Here's how you do it:

Supplies:
1. Wood letter or shape
2. Piece of scrapbook paper
3. Pencil and scissors or exacto knife
4. Modge podge and brush
5. Embellishments (like stick on pearls, beads, jewels or flowers)
6. Glue gun
7. Ribbon or string
8. Paint

How you make it:
1. Paint the back of the letter and the sides with the color of your choice.
2. Trace the letter on to the scrapbook paper you want on the letter (make sure you trace the correct side!) and cut it out with scissors
*if that's too much work, put the paper on the letter and trace/cut it out with an exacto knife.
3. Paint a layer of modge podge on the front of the letter and lay your cut out scrapbook paper on it.
4. Stick on any embellishments to the letter now so you can modge podge over it (unless you're doing jewels, wait till after).
5. Modge podge over the letter pressing outward so you can eliminate bubbles.  You can put several coats on the letter now so the paper will be secured to the wood.
6. Cut two even pieces of ribbon about 3/4 of a foot each, glue them to the back of the letter apart from each other toward the top and then tie the ends together in a bow so the letter can now hang!
7. Hang from your rear view mirror for a classy, polished look!

Family Tree/ Cute Cork board


Ok so big little is in 2 days and you're stressin about making a family tree but you're out of ideas?  Well I have your solution.
Or maybe you want to make a cute family tree for your grandmothers 70th birthday.
Or maybe you just really like trees!

Well here's a cute, easy idea that can help you solve any of those wishes!  It's a cork board with a tree painted on it, outlined in yarn.  Cute right?  Here's how you pull this off....

Whatcha need:
1. Cork board
2. Paint and paintbrushes
3. Yarn
4. Wood pieces
5. Markers
6. Flower embellishments
7. Glue gun with glue sticks
8.  Scissors
8 1/2. Patience
*Optional*
9. Tacs
10. Screws
11. Jewels


Here's how you make it!

1. Paint a tree coming off the right side, so essentially you're doing only half a tree.  If you're not a savvy artist, trees can be really easy: just start with the trunk then branch out to two branches then branch those two into two more so now you have 4 and then so on.  Make them go in slightly different ways for some variety!
2. Now, once that glue gun has heated up, unwind your yarn a little bit and glue the yarn around all the edges of the tree.  This is where you'll use your patience.  Start at the bottom of the tree and work you way up doing small sections at a time.  Go ahead and keep the yard going around all the branches that are cut off by the edge of the board.  You should have one string going from start to finish of the tree and then you can out lines pieces that are secluded between branches.
3. Then, take those cute flowers you have (I like to cut flowers off the big bundles that I buy at hobby lobby, or they also have little containers of flowers in the "spare parts" brand section) and glue a few of them to the tree.
4. Now paint small wood pieces (they have a bag of small wood rectangles in the wood section of hobby lobby) and write the names of your family members on them with marker once they are dry.  Glue these pieces to the tree in generation order (I started with the oldest at the bottom).
*Optional*
5. Glue an assortment of jewels to a few tacks for an added, functional touch to the board and stick them in the corner.
6. Since it's a cork board you can buy some screw in hooks and screw them in to the bottom of the cork board if it's a board that isn't lined with wood!  That way you can hang necklaces, keys or memorabilia on the bottom of your creation!

Now step back and look at this wonderful, one-of-a-kind, family tree you've just made.  Now let's just hope Crazy Aunt Susie doesn't notice you kicked her off the family branch.

Simple Stationary


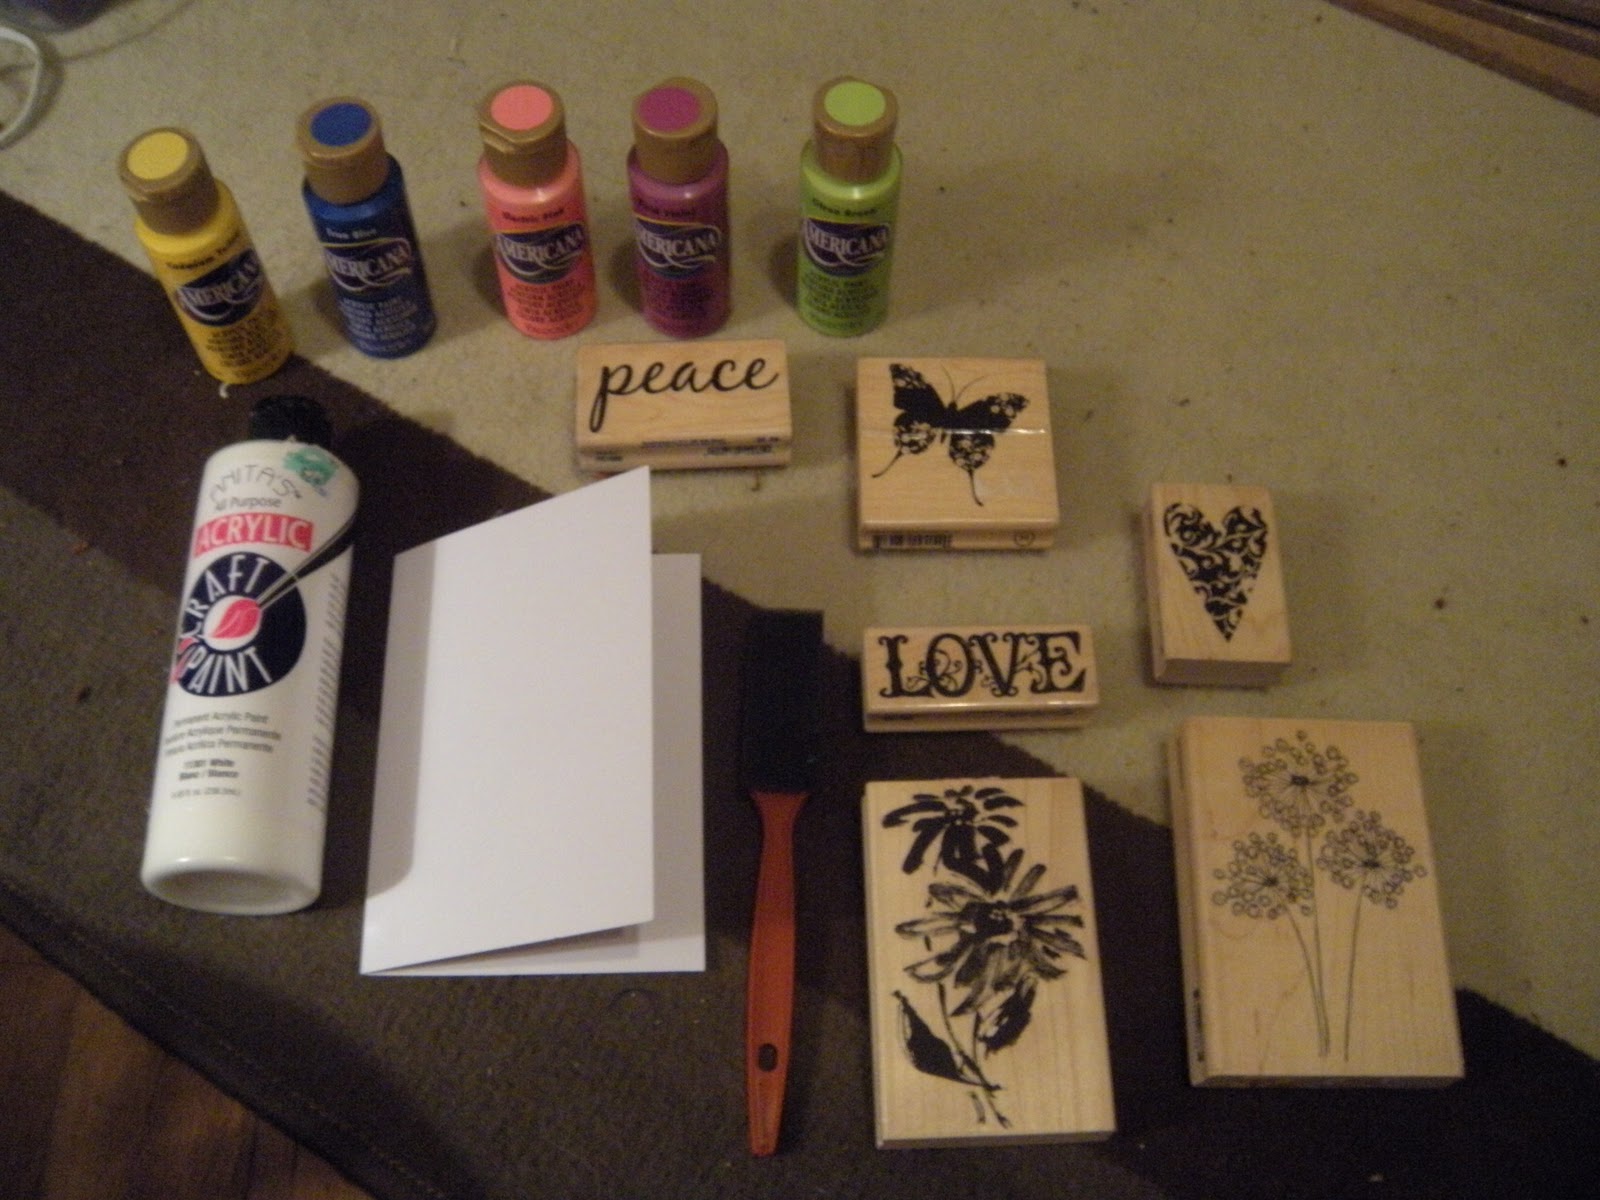
Need something cute, cheap and easy to give a friend for their birthday or your mom for mothers day?  Here's some adorable stationary and the steps to making it!

Supplies:
1. Paint and paintbrushes
2. Card stock or plain cards
3. Rubber stamps
4. Markers
5. Ribbon (for gift wrapping)


How do I do it?
1. Paint on the rubber stamp that you have chosen and stamp it on the front of the card.
2. Alternate how you stamp and if you want you can choose multiple stamps in different colors.  I like to choose a design (like a flower) and a word (like love, hope or peace) and pair them together.
3.  Let the cards dry and then add some detail with a marker that compliments the colors you've stamped with.  I like to add dots, zig zags or tiny flowers.
4. Stack the cards together and wrap with a ribbon like a present and you're all set.

These are perfect for gift giving because they're simple, usable and something unique that was hand crafted!  Now go get your creative juices flowing and create some cute stationary!